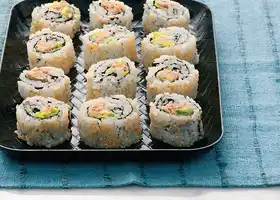
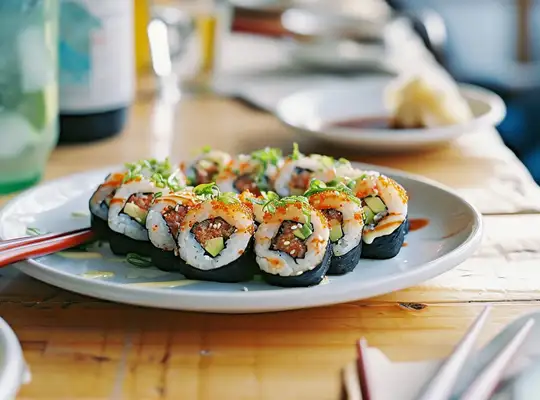
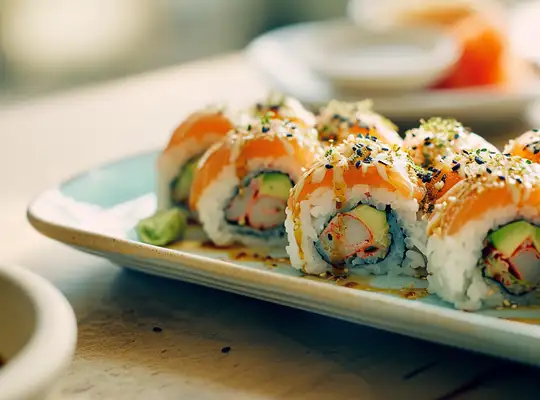
Download Stashcook Now. Get the best meal planning app for your family.


Sushi recipe
Updated

Sushi Recipes

Dive into making your own sushi! It's a fun kitchen adventure where you wrap up rice and your chosen goodies in seaweed. Roll it tight, slice it up, and wow everyone with bite-sized delights. Perfect for a family activity or impressing friends with homemade sushi night!

105 recipes to choose from

Recipes (105)

Discover 105 unique Sushi recipes. Each with it's own twist on the recipe.
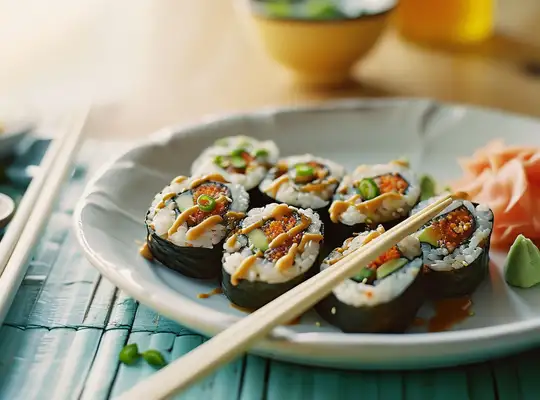
Download Stashcook Now

Save all your recipes in one place and meal plan with ease

Download on the App Store Get it on Google Play
Temaki Sushi (Hand Roll) recipe
# 3

Temaki Sushi (Hand Roll)

Just One Cookbook

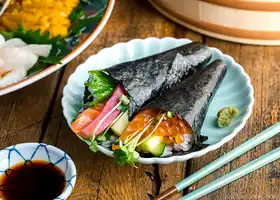
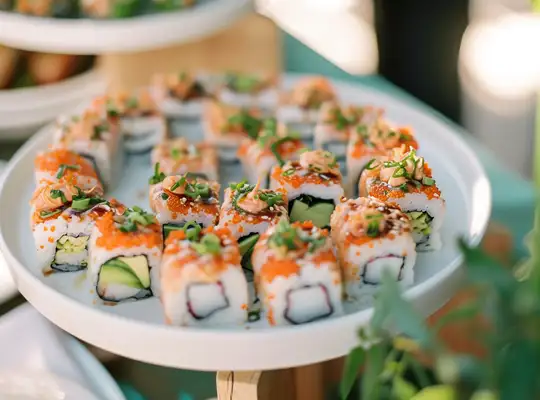
Make sushi at home with simple hand rolled sushi called Temaki Sushi. Everyone in the family (or at the party) will have fun rolling the nori sheets around sushi rice and their favorite fillings!

Vegan quinoa sushi recipe

Vegan quinoa sushi

olivemagazine

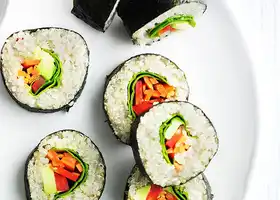
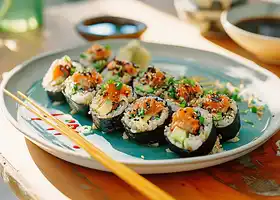
Using quinoa instead of rice means these rolls are higher in protein. We've kept them vegan too, no fish means leftovers will keep for a healthy lunchbox the next day
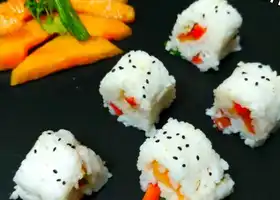
    • Dairy-Free

Explore Recipes by Tag

Frequently asked questions

1. What type of rice is best for making sushi?

The best type of rice for making sushi is a variety called short-grain Japanese rice or sushi rice. This type of rice has the perfect balance of high starch content and moisture absorption, which allows it to stick together when cooked, making it ideal for forming sushi rolls or nigiri.

When preparing sushi, you should look for brands that specifically label their product as "sushi rice." Some popular varieties include:

  • Koshihikari
  • Calrose

These types of rice become sticky when cooked, which is essential for sushi since it needs to hold its shape without falling apart. It's also important to rinse the rice thoroughly before cooking to remove excess starch and achieve the right texture.

Here's a basic outline on how to prepare sushi rice:

  1. Measure out the desired amount of sushi rice.
  2. Rinse the grains under cold water until the water runs clear.
  3. Soak the rinsed grains in water for about 30 minutes before cooking.
  4. Cook according to package instructions or use a ratio of 1:1 (rice-to-water) in a rice cooker.
  5. Once cooked, season with a mixture of rice vinegar, sugar, and salt while still warm.

Remember that proper seasoning and cooling are just as important as choosing the right type of rice when making authentic-tasting sushi at home.

2. How do I make the rice sticky enough for sushi?

To make the rice sticky enough for sushi, you need to follow a specific process when cooking and seasoning the rice. Here's a step-by-step guide using markdown syntax for emphasis:

Ingredients:

  • Sushi rice (also known as Japanese short-grain or medium-grain rice)
  • Water
  • Rice vinegar
  • Sugar
  • Salt

Instructions:

  1. Measure the Rice: Start by measuring out the amount of sushi rice you'll need. A good rule of thumb is about 1 cup of uncooked rice per 3 rolls of sushi.
  2. Wash the Rice: Rinse the rice in cold water until the water runs clear. This removes excess starch from the surface, which can cause it to be too sticky.
  3. Cooking:
    • Add your washed sushi rice to a pot with an equal amount of water (1:1 ratio).
    • Let it soak for about 30 minutes before cooking; this helps achieve an even consistency.
    • Bring it to a boil, then reduce heat to low and cover.
    • Cook for about 15 minutes or until all water has been absorbed.
    • Remove from heat but keep covered and let it steam for another 10 minutes.
  4. Seasoning:
    • While your rice is cooking, prepare your sushi vinegar mix by combining rice vinegar, sugar, and salt. The typical ratio is about 5 tablespoons of vinegar, 2 tablespoons of sugar, and 2 teaspoons of salt for every cup of uncooked rice.
    • Heat this mixture just enough to dissolve sugar and salt but do not boil.
  5. Mixing:
    • Transfer cooked hot rice into a large wooden bowl (a traditional Hangiri if available) which will help absorb excess moisture.
    • Gently fold in your seasoning mix with a paddle or spatula while fanning or allowing cool air onto the hot rice; this gives it that shiny look and perfect stickiness without being overly wet.
  6. Cooling Down: Allow your seasoned sushi rice to cool down slightly before using it; ideally, it should be at room temperature when assembling your sushi rolls.
  7. Handling: Keep hands wet when handling sticky sushi rice so that it doesn't stick too much to your fingers as you work with it.

By following these steps carefully, you'll have perfectly sticky sushi-grade-rice ready for making delicious homemade sushi! Remember not over-stirring as that can make the grains mushy rather than keeping their individual integrity intact which is essential in good quality Sushi Rice preparation!

3. Do I need a bamboo mat to make sushi rolls?

No, you do not need a bamboo mat to make sushi rolls, although it is a traditional tool that can help in rolling tight and even sushi. However, if you don't have one, there are alternative methods you can use:

  1. Plastic Wrap: Lay a sheet of plastic wrap down on your work surface and place the nori sheet on top of it. Add your ingredients and use the plastic wrap to roll the sushi into shape.
  2. Kitchen Towel: Use a clean kitchen towel as an alternative to the bamboo mat. Place a piece of parchment paper or plastic wrap over the towel before adding your nori sheet to prevent sticking.
  3. Freehand Rolling: With some practice, you can roll sushi using just your hands. This method might be messier and less precise but is certainly doable with patience.
  4. Sushi Mold: There are also plastic molds available that can help shape your sushi rolls without needing a mat.

Remember that making good sushi rolls requires practice, so don't be discouraged if your first few attempts aren't perfect!

4. Can I use raw fish in my homemade sushi?

Yes, you can use raw fish in your homemade sushi, but it's important to ensure that the fish is fresh and safe to consume raw. Here are some key points to consider when using raw fish for sushi:

  1. Source High-Quality Fish: Look for a reputable supplier who sells "sushi-grade" or "sashimi-grade" fish, which indicates that it has been handled and frozen in a way that makes it safe for raw consumption.
  2. Freezing Guidelines: According to the FDA, freezing at certain temperatures can kill parasites that might be present in raw fish. The recommended freezing guidelines are:
    • Freezing at -4°F (-20°C) or below for 7 days (total time), or
    • Freezing at -31°F (-35°C) or below until solid and storing at this temperature for 15 hours, or
    • Freezing at -31°F (-35°C) or below until solid and storing at -4°F (-20°C) or below for 24 hours.
  3. Proper Handling: Always maintain good hygiene practices by keeping the work area clean and washing your hands thoroughly before handling any food items.
  4. Storage: Keep the fish refrigerated until you're ready to prepare your sushi, and try to use it as soon as possible after purchasing.
  5. Cross-Contamination: Avoid cross-contamination by using separate cutting boards and knives for your raw seafood and other ingredients.
  6. Know Your Fish: Some types of fish are more prone to parasites than others (e.g., salmon). Educate yourself on which varieties are safer options when eaten raw.
  7. Trust Your Senses: If the fish smells overly "fishy," looks discolored, feels slimy, or has any other signs of spoilage, do not use it in your sushi.

Remember that consuming raw seafood carries an inherent risk of foodborne illness regardless of precautions taken; individuals with compromised immune systems should avoid eating uncooked seafood altogether.

5. How do I properly roll sushi without it falling apart?

Rolling sushi can be a delicate process, but with the right technique and some practice, you can create rolls that hold together well. Here's a step-by-step guide on how to properly roll sushi:

Ingredients and Tools

  • Sushi rice (properly prepared and seasoned)
  • Nori sheets
  • Fillings (such as fish, vegetables, or whatever you prefer)
  • A bamboo rolling mat (makisu)
  • A bowl of water
  • A sharp knife

Steps to Roll Sushi

  1. Prepare Your Ingredients: Make sure your sushi rice is at room temperature and your fillings are cut into long strips.
  2. Place the Nori Sheet: Lay a sheet of nori shiny side down on your bamboo mat.
  3. Spread the Rice: Wet your fingers in the bowl of water to prevent sticking, then take a handful of rice and spread it evenly over the nori sheet, leaving about an inch uncovered at the far end.
  4. Add Fillings: Place your chosen fillings in a line along the near edge of the rice-covered nori.
  5. Start Rolling:
    • Lift up the edge of the bamboo mat closest to you with both hands.
    • Use it to fold over the filling so that it falls onto about one-third of exposed rice.
    • Gently squeeze along the length of what is now forming into a roll; this helps everything stick together without squashing it.
  6. Continue Rolling:
    • Lift up on bamboo mat slightly while rolling forward to allow for complete rolling without wrapping in bamboo.
    • Roll forward until only an inch-wide strip of uncovered nori remains at far end.
  7. Seal The Roll:
    • Dampen your fingers with water again and lightly moisten this strip.
    • Finish rolling by pulling up on bamboo mat while simultaneously pushing forward until completely rolled into shape.
  8. Let sit for 1 minute with seam side down so that moisture from rice seals roll shut.
  9. Cut The Sushi:
    • Use a sharp knife dipped in water for each cut to prevent sticking.
    • Slice through center first then divide each half again until desired size pieces are achieved usually six or eight per roll).
  10. Serve immediately with soy sauce, pickled ginger, and wasabi if desired.

Tips for Success

  • Ensure that you're using sushi-grade fish if making raw fish rolls for safety reasons.
  • Don't overfill; too much filling can make it difficult to roll tightly.
  • Keep all ingredients dry except when using water intentionally; excess moisture can cause rolls to fall apart.
  • Practice makes perfect! It might take several attempts before getting comfortable with technique.

By following these steps carefully and practicing regularly, you'll be able to produce well-formed sushi rolls that won't fall apart when sliced or picked up with chopsticks!

6. What is the difference between nigiri and maki sushi?

Certainly! Here's an explanation of the difference between nigiri and maki sushi, with markdown syntax for highlighting:

Nigiri Sushi

  • Nigiri (握り寿司) is a type of sushi that consists of a slice of raw fish (or other topping) draped over an oblong mound of pressed vinegared rice.
  • The rice is typically mixed with a small amount of wasabi, and the fish may be secured to the rice with a thin strip of nori (seaweed), although this isn't always the case.
  • Nigiri is often served in pairs and is meant to be eaten by hand.

Maki Sushi

  • Maki (巻き寿司), short for makizushi, refers to sushi rolls where ingredients such as seafood, vegetables, and sometimes tropical fruits are rolled inside nori seaweed sheets along with vinegared rice.
  • Maki rolls are then sliced into bite-sized pieces. There are several types including:
    • Hosomaki: Thin rolls with one filling ingredient.
    • Futomaki: Thick rolls that contain multiple filling ingredients.
    • Uramaki: Inside-out rolls where the rice is on the outside and nori holds the fillings inside.
    • Temaki: Hand rolls that are cone-shaped.

In summary:

  • Nigiri focuses on showcasing individual pieces of fish or toppings on top of shaped rice without rolling them in seaweed.
  • Maki involves rolling various ingredients in seaweed sheets along with vinegared rice into cylindrical shapes before slicing them into rounds.

7. What type of seaweed should I use for making sushi rolls?

For making sushi rolls, you should use nori seaweed. Nori is a type of edible seaweed that comes in thin, dried sheets. It's specifically used for wrapping around the rice and filling to form sushi rolls, also known as maki. When purchasing nori for sushi-making, look for sheets that are dark green to black in color and have a uniform texture without any holes or tears.

Here's how you can prepare your sushi rolls using nori:

  1. Place a sheet of nori on a bamboo rolling mat (makisu).
  2. Spread an even layer of sushi rice over the nori, leaving about an inch (2-3 cm) uncovered at the top edge.
  3. Arrange your chosen fillings (like fish, vegetables, or tofu) along the bottom edge of the rice-covered nori.
  4. Lift the bottom edge of the bamboo mat to roll it over the fillings tightly.
  5. Continue rolling with gentle pressure until you reach the uncovered strip at the top.
  6. Moisten this strip with a little water to help seal the roll closed.
  7. Use a sharp knife to cut your roll into bite-sized pieces.

Remember that there are different grades and qualities of nori; if possible, opt for high-quality "sushi-grade" nori as it tends to be more flavorful and less prone to tearing when rolled.

Enjoy making your sushi!

8. How do I make sushi rice vinegar?

To make sushi rice vinegar, you will need the following ingredients:

  • 1 cup of rice vinegar
  • 2 tablespoons of sugar
  • 1 teaspoon of salt

9. Can I use quinoa instead of rice for making sushi?

Yes, you can use quinoa instead of rice for making sushi. Quinoa is a nutritious seed that has gained popularity as a healthy alternative to traditional sushi rice due to its high protein content and rich nutrient profile.

Remember that while using quinoa can be delicious and healthy, its texture differs from traditional sticky sushi rice—it's less sticky so rolls may not hold together quite as firmly as they do with rice—but many people enjoy this variation on classic sushi nonetheless!

😍 Simplify Your Meal Planning

Seamlessly add your favorite Sushi recipes to your personal digital cookbook.

But that's just the start! Add recipes from cookbooks and magazines too. Stashcook's AI technology extracts recipes right off the page with just one click.

With Stashcook, organize all your recipes in one convenient place and master meal planning like a pro. Join the thousands already making meal planning simpler and more enjoyable.

Download Stashcook for FREE today and begin your journey to effortless meal planning.

Download on the App Store Get it on Google Play
Stashcook logo

The simple meal planning app

Social

© Copyright 2024 Stashbox Ltd. All rights reserved.